There are many reasons that you want to record your computer screen, for example, making a video tutorial, going group online meeting, or creating gameplay videos. On those occasions, the biggest problem is to find a suitable screen recorder to help you. So do I. But it’s quite fortunate for me that I met my perfect partner to capture any computer screen easily. In this post, I would like to share the best screen recorder for Windows and Mac with all of you who need a powerful screen capturing software. Moreover, the detailed tutorial will be following below.

The Best Screen Recorder for Windows/Mac – RecordAnyVid
When asking many people for screen recorder recommendations, many of them will share Camtasia. However, this powerful screen recorder is too expensive to afford for many of us. To find its alternatives, I met RecordAnyVid.
RecordAnyVid is a professional screen recorder for Windows and Mac, consisting of Video Recorder, Audio Recorder, and Screenshot service. Moreover, this screen recorder also supports to make webcam recording, which is necessary for online video meeting. One of the biggest features of RecordAnyVid is that it supports capturing videos with no watermark for free. Most importantly, its affordable price is considered for most people. Besides, if you don’t want to pay for it and your recording video would be less than 3 minutes under limitations, you can directly enjoy the free version of the RecordAnyVid program.
Many of you might care about the output profile of the recording video. In this case, you can totally set your mind at rest. RecordAnyVid supports output recorded videos in MP4, WMV, MOV, AVI, GIF and so on. Moreover, the output quality is satisfying, ranging from Lowest to Lossless. You can preset your own output profile based on your favor easily.
Differences Between Free Trial and Registered RecordAnyVid
| Free Version | Registered Version | |
| Time Length | Up to 3 Minutes | Unlimited |
| Trim Video/Audio Clip | No | Yes |
| No Watermark | Yes | Yes |
| Service Supports | Yes | Yes |
Pros and Cons of RecordAnyVid
RecordAnyVid is a trustworthy screen recorder for both Windows and Mac users. If you are looking for a screen capturing software, try RecordAnyVid.
Pros:
- It supports video recording and only-audio recording.
- It supports webcam recording.
- It supports making GIFs.
- It’s easy to use.
- It offers a free version to try.
- Real-time video editing is supported.
- Various output formats are supported.
- The high output quality is offered.
- No watermark is on the recorded video.
- User-friendly interface design.
- Affordable price.
Cons:
- It doesn’t support to do post-production editing after recording.
How to Capture Computer Screen by Using RecordAnyVid on Windows/Mac
RecordAnyVid is available to download on both Windows and Mac computers. You can directly download this screen recorder on its official website. If you are a starter of video recording, then follow the tutorial below to start your journey.
STEP 1. Launch Video Recorder on RecordAnyVid
When you open RecordAnyVid, there are 3 recorders you can choose – Video Recorder, Audio Recorder, Screen Capture. In this step, click “Video Recorder” to start your screen activity capturing.

STEP 2. Select the Recording Area
RecordAnyVid allows users to record the full screen of a Windows or Mac computer. For the self-made video tutorials, the full-screen recording might be a good choice. Besides, for group meetings or reaction videos, you can enable the webcam button to record yourself at the same time. If you just want to record a specific area, you can customize the recording area as well.

STEP 3. Customize the Audio Settings
System sound and microphone sound can be recorded in the video. By default, both “System sound” and “Microphone” options are enabled. If you don’t need to record microphone sound or want to get rid of environment noise, you can turn off the “Microphone” option. Moreover, you can volume up and down of the system sound in this step.
STEP 4. Preferences Settings (Optional)
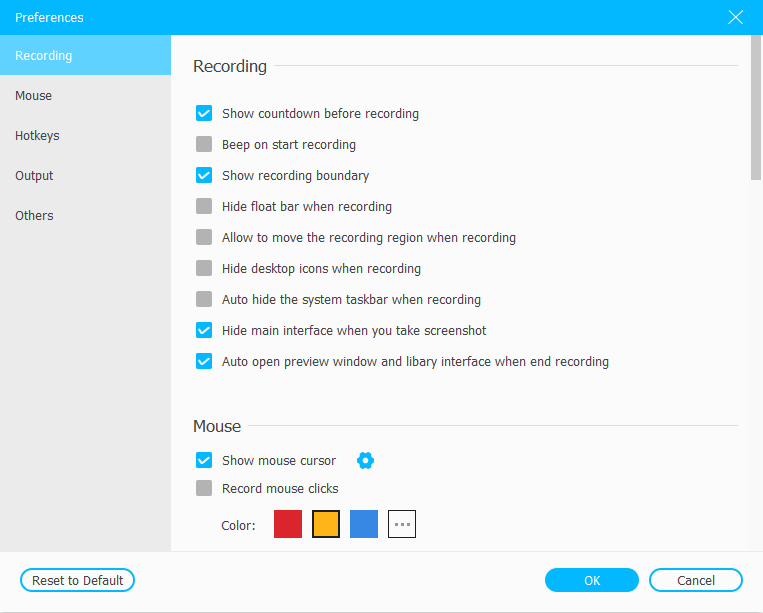
In addition to the settings above, you can find more recording settings in “Preferences” by clicking the gear icon. It allows you to set mouse cursor and record mouse clicks, which are great help for video tutorial recording. More preference setting is custom based on your need.

STEP 5. Start Recording Any Screen on Windows/Mac
When finished all recording settings, one last thing to do is clicking the “REC” button to start recording your computer screen. One of the biggest features of RecordAnyVid is real-time editing. This screen record supports to add circles, lines, texts, an arrow with different colors to highlight the information the video. If you need it, it will be greatly helpful.

STEP 6. Save Recording Video
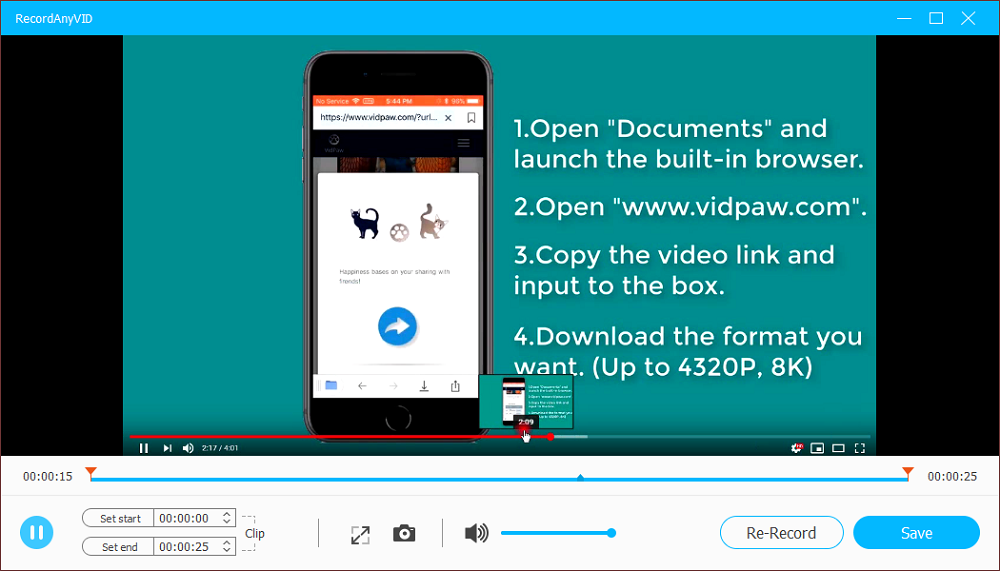
Last, click the red square button to stop recording. Then, you can preview your recorded video. If it’s fine, you can directly click “Save” to save the video to a local folder. If you are not satisfied with the video, you can also click “Re-record” to start your recording again.

Literally, the whole recording process is really easy to follow with its easy-to-understanding instructions. For any new starter, you can easily record any screen on your Windows or Mac computer. Beyond no doubt, RecordAnyVid is one of the best screen recorders for both Windows and Mac users in 2020.

Leave a Reply